SPOT Mapping Support
General
How to create a custom map layer aka overlay?
Often it's valuable to overlay custom information on top of a standard map to provide additional (or otherwise missing) information about a place or region. This information can be added to SPOT Mapping in the form of custom Map Layers, also called overlays.
By default, a standard set of Map Layers are included with every SPOT Mapping account, found under the Layers dropdown menu at the top-right of the tracking map. These layers can have their visibility toggled by selecting them. Map Layer visibility preferences are saved across login sessions, allowing a user to keep their customized view settings.
Many people or companies will have additional information that they would like to have overlaid on to the map in the form of lines, polygons, points or even images. For example, a hiker may wish to have an overlay of an often-traveled route or you can add newly cut dirt roads not found on available maps.
To facilitate this, SPOT Mapping supports overlaying custom map layers that are created in KML (Keyhole Markup Language), GPX (GPS Exchange Format), WMS (Web Map Service), GeoJSON, Tile Layers, or Image Overlays. These formats are easily exportable from the most popular GIS tools, including Google Earth and ArcGIS.
To demonstrate this, we can create a layer in the freely available Google Earth program and import it into SPOT Mapping:
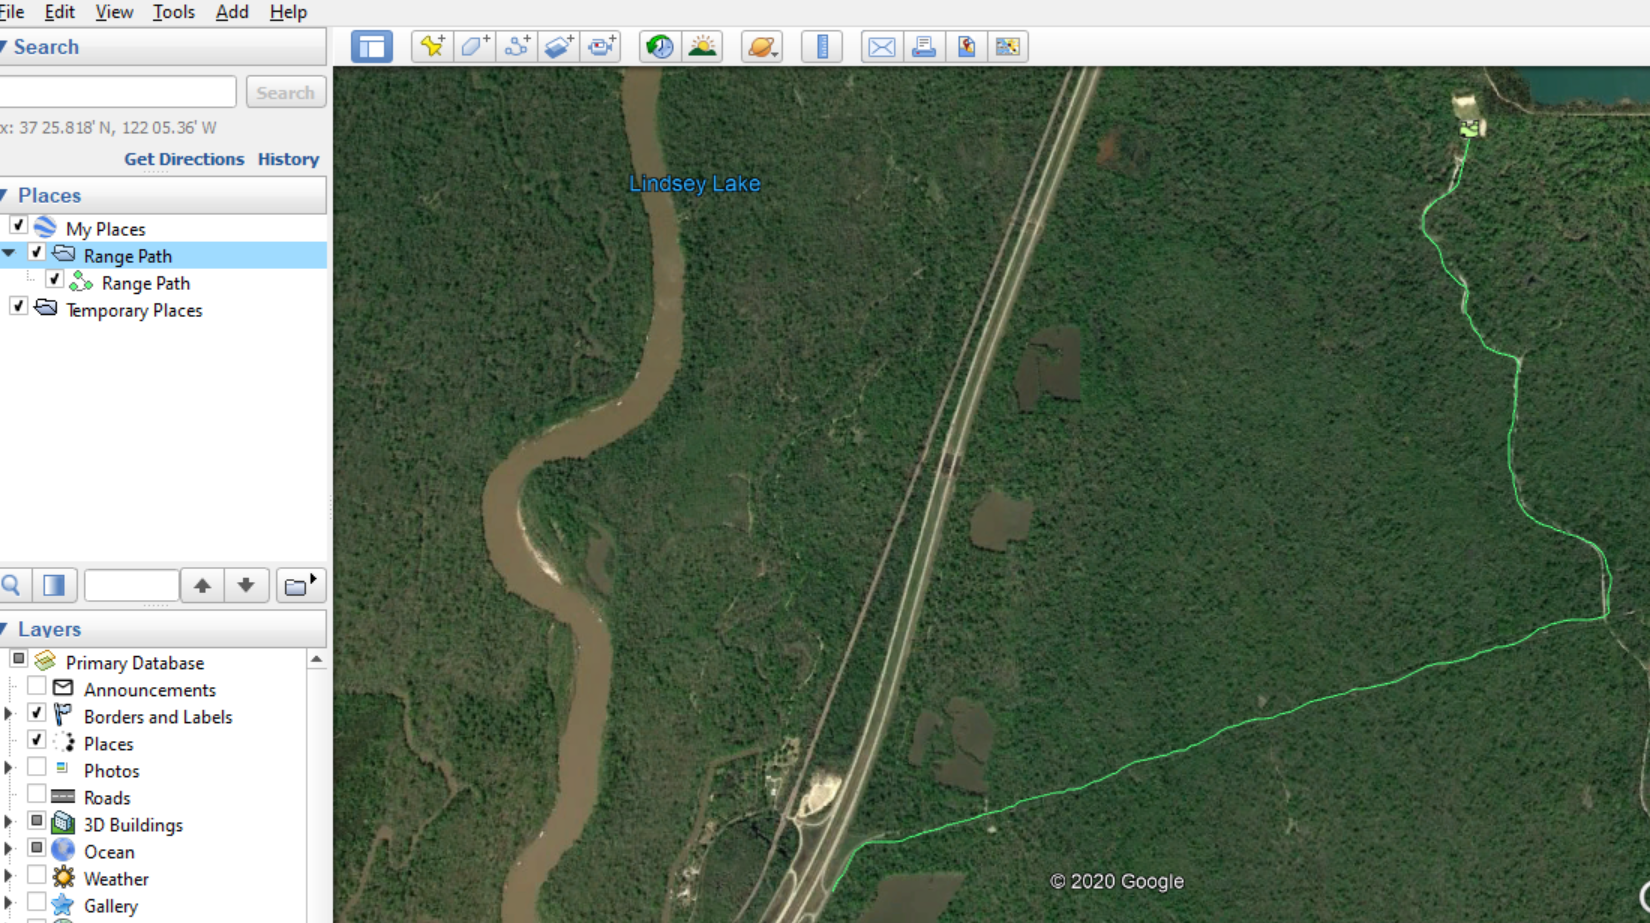
1.) Open up the Google Earth application and add a Path to the map using the toolbar at the top:

2.) In this example, I’ve created a Folder and added a Path:
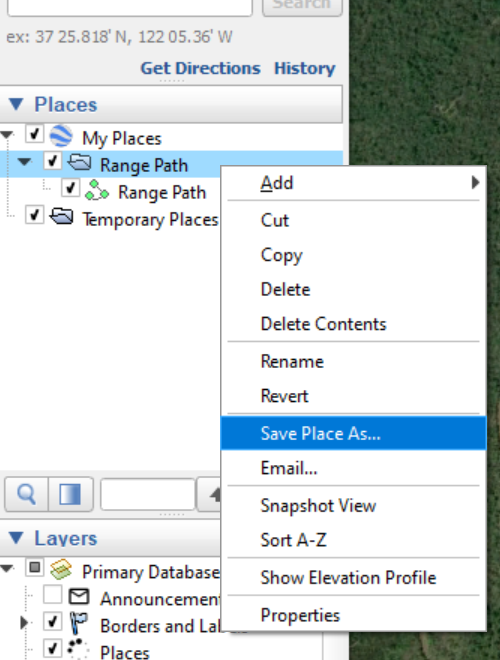
3.) Once completed, you can export your Folder as a KML by right clicking on the folder or item and choosing “Save Place As”. Save it as a KML file to upload to SPOT Mapping.
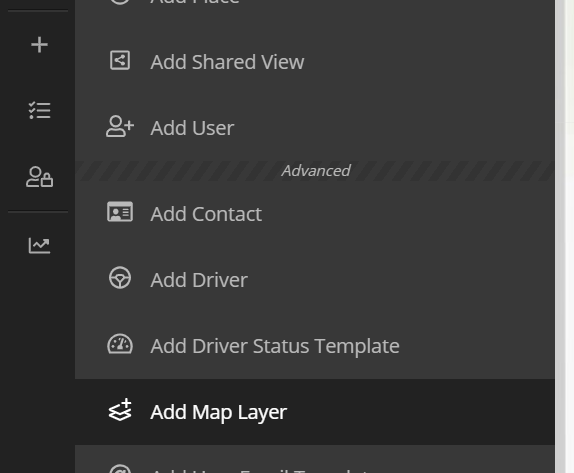
4) Once your layer has been created you can upload it to SPOT Mapping. Click on the add item “+” and click add map layer to upload your custom layer.
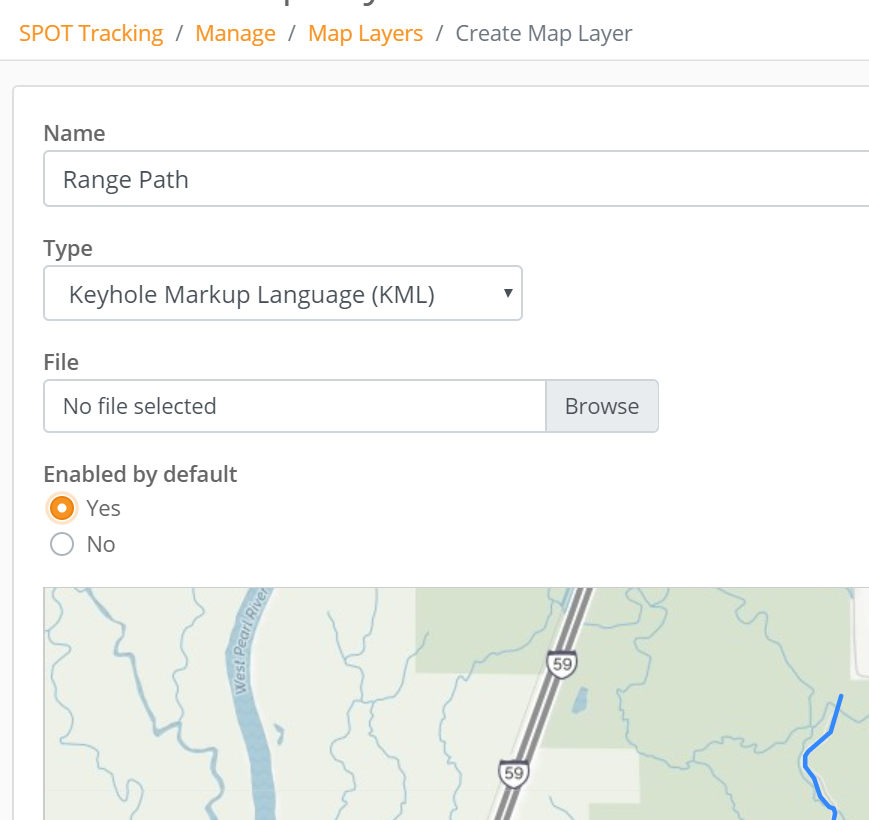
5) Name your layer, choose the format you’re uploading and choose the file from your computer. Then click the “Preview Map Layer” button to preview what will appear on the map before actually creating your layer.
6) Once previewed you can then click the “Create Map Layer” button to officially add it to your portal view. Navigate back to the tracking map via the “Assets” tab and you’ll now see your new custom layer available in the Layers dropdown list.
In addition to the standard GeoJSON and KML formats, SPOT Mapping also supports custom tile overlays using your own (or a third party’s) WMS (Web Map Service) such as TileCache.
CALL
Phone support is available Monday to Thursday 24hrs CST.Friday: 12:00AM to 10:00PM CST.
Please have your PIN ready when calling.
PIN confirmation is not supported via voice. Please enter your pin on your phone dial-pad.
Your PIN, personal identification number, can be found by logging into My Account and clicking on Settings and Billing.
1 (866) 651-7768
Currently traveling outside of the US?
1 (985) 327-7511
Chat with an Agent
Chat Support is available in English. Additional languages are supported using machine translation.Service cancellations and payments are not supported via chat.
Chat is available Monday through Friday, from 7:00AM to 6:00PM CST.
Chat support is only available with Chrome, Edge, Firefox, Opera and Safari.